

 Dragonstone Donator
-
Posts
84 -
Joined
-
Last visited
-
Days Won
19
Everything posted by Con
-
Should make it use able only in Wildy in my opinon, can be overpowered in pvm.
-
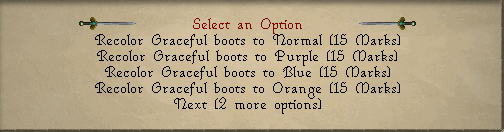
Con's Agility Guide Intro: Agility is one of the more annoying and pointless skills on BoomScape but has to be done if you want to max. I will be going through the fastest way to 99. There are other options ,but why make this grind slower than it has to be? *If you are on Runelite, turn on the plugin "Agility" because it will show you where to click and make it a little more afk* Graceful Outfit: Graceful is different on BoomScape than in OSRS. This is because on BoomScape we have unlimited run energy, except for the wildy, so we decided to give graceful an xp bonus per piece similar to the rogue's outfit. GRACEFUL IS HIGHLY RECOMMEND FOR THIS GRIND. It can be obtained either through the donator store for $10, or through the agility roof top course, although getting it through agility will significantly slow down your grind. The full graceful set gives a 3.7x xp boost so each piece gives about a 0.7x xp boost. Obtaining graceful in game: During rooftop courses, marks of grace will randomly spawn each time you start a new lap. The amount that spawns depends on your donator rank and you can check this on ::thread 12. The marks of grace can be spent at Grace who is found at the Rogue's den in Burthope. The price for each piece is as follows: - 35 marks - 55 marks - 60 marks - 30 marks - 40 marks - 40 marks Graceful pieces can also be recolored by using each piece on Grace. 1-30 Gnome Stronghold: Getting there: ::home > nexus > cities > Tree Gnome Stronghold From here run south to the agility course *We skip lower level rooftop courses to reduce teleporting and time wasted* Xp needed for level 30: 13,363 xp Xp per lap (No graceful): 3,320 xp Laps needed: About 4 laps, may have to do one extra Xp per lap(Graceful): 12,284 xp Laps needed: About 2 laps 30-50 Varrock Rooftop Course: *We skip lower Canifis rooftop course because it only gives 80 xp more* Getting there: ::home > nexus > cities > Varrock Run southeast to east side of general store to start Xp needed for level 50: 87,970 xp Xp per lap(No graceful): 9,520 xp Laps needed: About 9 laps Xp per lap(Graceful): 35,224 xp Laps needed: About 3 laps 50-60 Falador Rooftop Course: *We skip lower Pollnivneach rooftop course because it is broken atm* Getting there: ::home > nexus > cities > Falador Run east following the path to the fountain and then go south Xp needed for level 60: 172,409 xp Xp per lap(No graceful): 17,600 xp Laps needed: About 10 laps Xp per lap(Graceful): 65,120 Laps needed: About 3 laps 60-80 Seer's Village Rooftop Course: Getting there: ::home > nexus > cities > Camelot Run west to the bank Xp needed for level 80: 1,712,326 xp Xp per lap(No graceful): 22,800 xp Laps needed: About 75 laps Xp per lap(Graceful): 84,360 xp Laps needed: About 18 laps 80-90 Rellekka Rooftop Course: Getting there: ::home > nexus > cities > Rellekka Run west to clothing store Xp needed for level 90: 3,360,264 xp Xp per lap(No graceful): 31,200 xp Laps needed: About 107 laps Xp per lap(Graceful): 115,440 xp Laps needed: About 29 laps 90-99 Ardougne Rooftop Course: Getting there: ::home > nexus > cities > Ardougne Run southeast Xp needed for level 99: 7,688,099 xp Xp per lap(No graceful): 31,720 xp Laps needed: About 242 laps Xp per lap(Graceful): 117,364 xp Laps needed: About 66 laps Hope you enjoyed my guide!

-
IGN: Con Reward wanted: 20 Ckeys Did any of the following influence your decision to download BoomScape: RuneLite Plugin Yes Mobile App Yes Ironman Mode Yes Raids Yes Bosses & Pets Yes Complete Player Owned Homes Yes Regular Updates Yes Flowers & Staking No Wintertodt Yes Number of Players Online No What was most important to you: PvM Does the low xp rate (20x & 40X) appeal to you: Yes Do you like Mystery Boxes For mains but not for ironman OPTIONAL SECTION OF SURVEY How you found us (on list, or clicked ad?): Found on one of the RSPS lists.
-
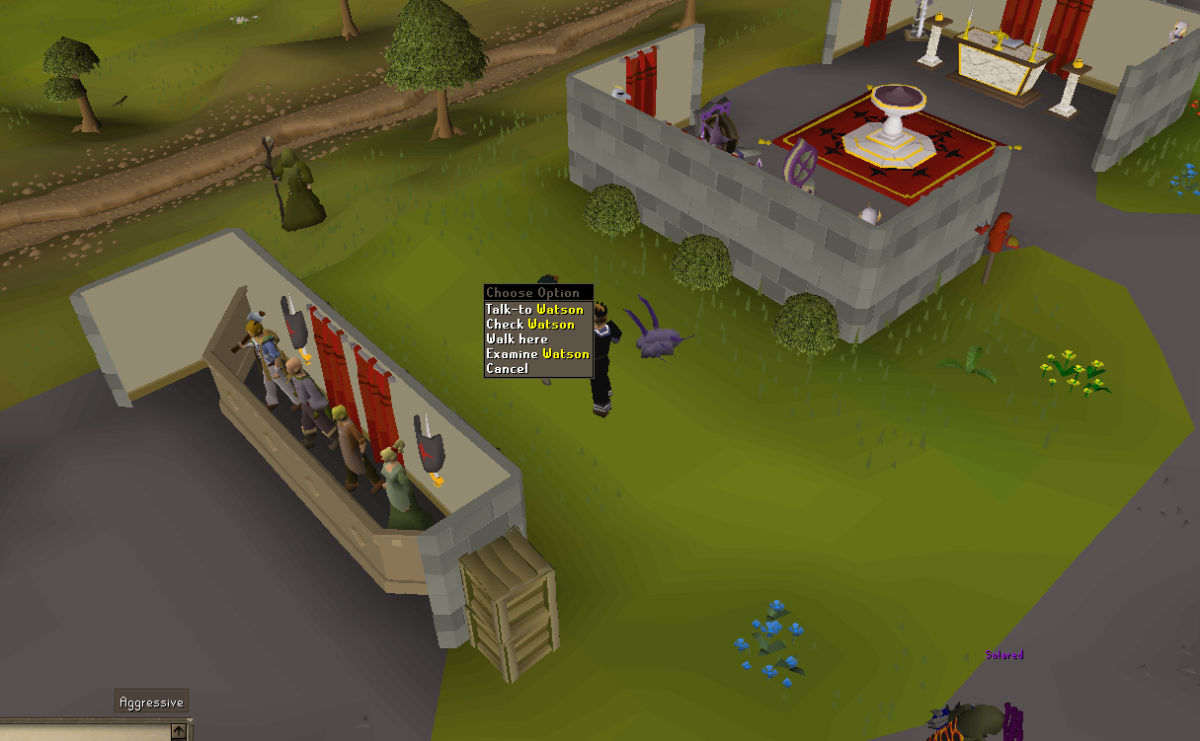
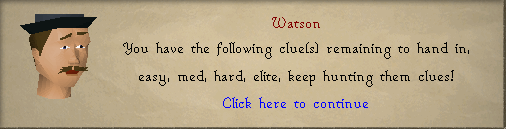
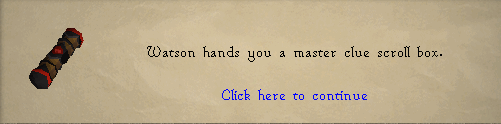
How to Get Master Clues Master clues are the highest level clue scroll and offer some great rewards, the best in my opinion is the bloodhound pet. They are just like the other tier clues on BoomScape but are slightly longer than the others. They are only obtainable in two ways: 1. Getting it from a lower level clue Pretty self explanatory, you complete an easy, medium, hard, or elite clue and you have a chance of receiving a master clue as a reward. 2. Trading in clues to get a master clue At ::home, north of the bank and nexus, is a man named Watson. He can take the 4 previous tier clue scrolls (easy, medium, hard, and elite) and will give you one master clue for them. You do not need all 4 at a time, you can get one and trade it in, then come back once you have the others or one more. *The clues can not be in scroll box form and Watson can only hold one type of each clue* Once you trade all 4 clues to Watson he will give you a master clue scroll box. After this you can trade more clues in for more. Rewards from master clues: https://oldschool.runescape.wiki/w/Reward_casket_(master) Happy hunting!
-
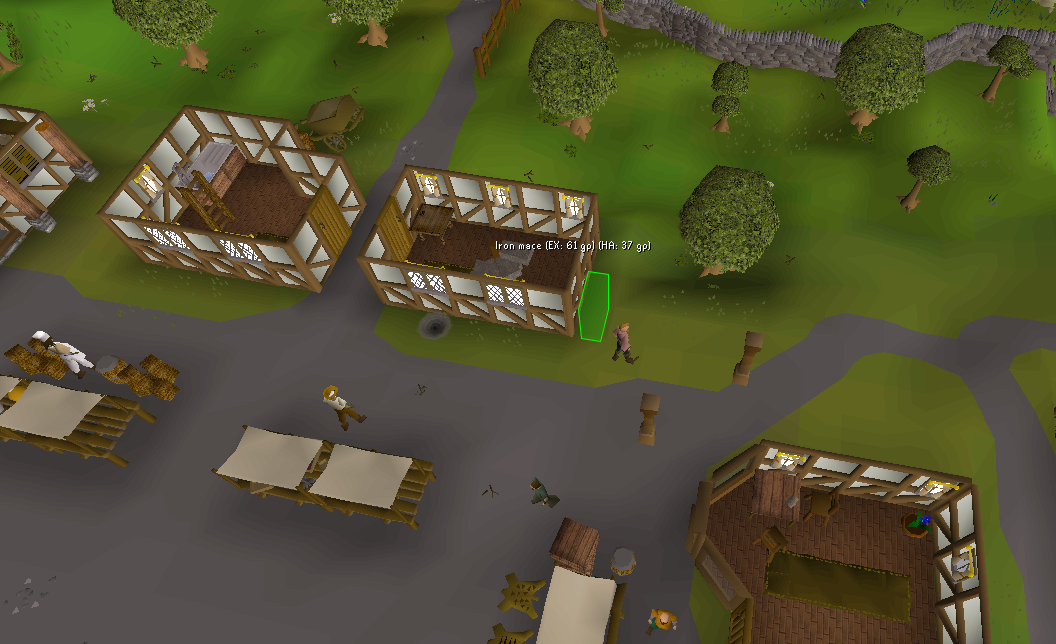
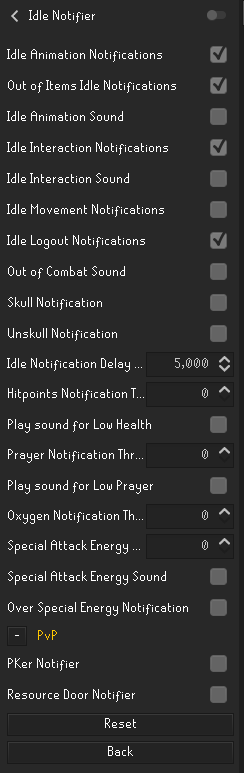
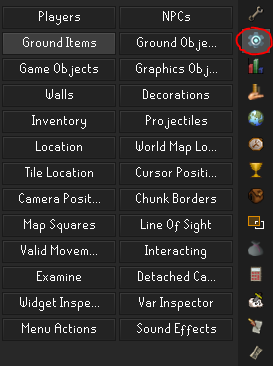
Useful Runelite Plugins What is Runelite? Runelite is a 3rd party runescape client that has many helpful interfaces and features that improve the quality of life for osrs and BoomScape. It ranges from helping with boss mechanics to telling you when you stop doing an action, though this can be annoying. Turning off idle notifications: In settings on runelite look up "Idle Notifer" and turn it off. If you only want notifications for a few things you can click on the gear and modify what actions set off the notification and how often. Useful Plugins: "GPU" Allows you to turn up the draw distance so you can see father in game and be able to click things that are farther away. Note, this does require a decent gpu to run. *If you crash in certain areas you may need to disable it* "Animation Smoothing" Makes animations of the game a lot more fluid and smooth. "Clue Scroll" Helps you solve clue scrolls by telling you where to go, who to talk to, or where to dig. Note, some clues are broken on BoomScape so do not always rely on this. "Player Indicators" Shows people's names above there head, you can choose to enable it for clan members, friends, or all players and choose custom colors for each. "Ground Items" Highlights and shows the name of items on the ground. Can be customized to have different colored text depending on the price of the item. (Price is based off of OSRS prices). "Ground Markers" Allows the marking of tiles on the ground. This can be done by using shift+right click and choosing mark tile. This can be helpful for bossing for remembering safespots or where to move. "Loot Tracker" Adds a widget onto Runelite that tracks all the loot you recieve from a certain type of monster. Also tracks how many you kill. (Resets everytime the client is closed) "Xp Tracker" Tracks your xp gained and how much xp per hour you are getting. "Camera Zoom" Allows you to set higher and lower camera zoom bounds. "Key Remapping" Allows you to use WASD to move the camera around and be able to use number keys as F keys. "Agility" Shows you where to click on agility courses, makes agility a lot more afk in my opinion. Developer Tools: A lot of things here aren't very useful, but Detached Camera can be useful if you are making a video or if you find a bug. These can be useful for debugging: NPCs, Game Objects, or Ground Objects. James or Papa J may ask you for the ID of a thing and this is how you would get it.
-
Thanks Mosey ¢¤¯¸ think it will help a lot of people out.
-
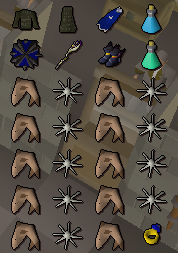
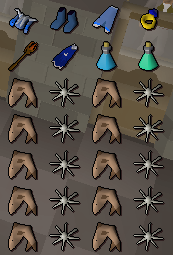
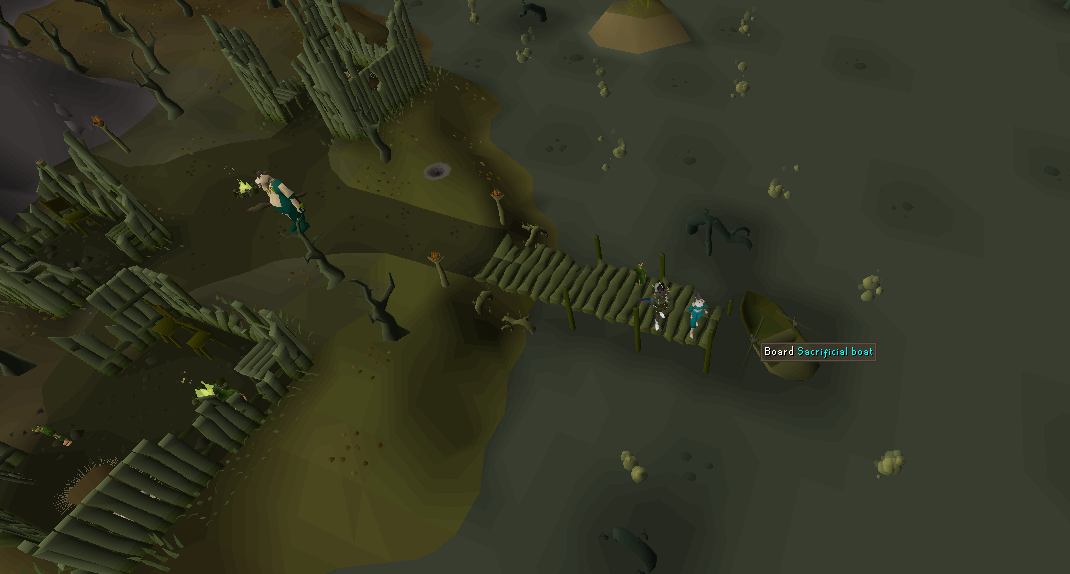
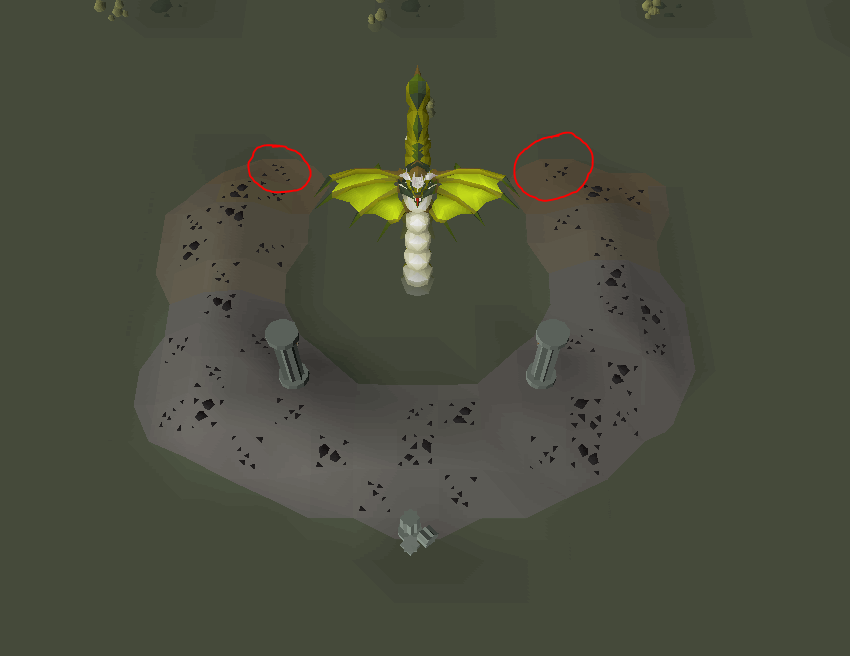
Con's Zulrah Guide *ZULRAH IS NOT A SAFE DEATH FOR HARDCORE* Intro: Zulrah on BoomScape is very similar to zulrah on OSRS besides the rotations, so if you have prior experience with zulrah this guide is probably not need. However zulrah is a great way to make money on BoomScape and drops many good gear upgrades such as the tanzanite fang, magic fang, serpentine visage and of course its pet. This guide will not cover the rotations of zulrah as it is more fun to learn but this guide will give you the confidence to go out and kill zulrah. Recommend Levels: 85+ Magic 80+ Range 70+ Defence 44+ Prayer Recommend Gear Setups: Zulrah can be done a variety of ways such as mage only, range only, or hybriding(mage and range). I wil go through a budget setup and slightly more expensive setup of each. Feel free to change whatever you need to fit your liking. (This section may be a bit long) Mage only(Cheap): In this setup we will be using Iban's blast for the whole kill. Use mystic might/augury during the whole fight. Mage only(More Expensive): This isn't a max mage setup(too broke for it) but you can use the trident of the swamp or just a normal trident. This could be subbed with a kodai and ice barrage as well. Use mystic might/augury during the whole fight. Range only(Cheap): In this setup we will be using ruby bolts(e) for their high hitting proc, once zulrah is below half hp, I switch to diamond bolts(e) because the ruby bolts(e) proc becomes inefficent. Use eagle's eye/riguor during the whole fight. Range only(More Expensive): The sitback and relax setup. I like to run dragon darts in my blowpipe but rune or addy work as well. Use eagle's eye/riguor during the whole fight. Range & Mage(Cheap): During hybrid runs you want to attack the range and melee phase with magic and the magic phase with range. (We will talk more about this later). Bring as many or as little switches as you like, void is also a good option if you only want a helm and weapon switch. Use offensive range and mage prayers. Range & Mage(More Expensive): During hybrid runs you want to attack the range and melee phase with magic and the magic phase with range. (We will talk more about this later). Bring as many or as little switches as you like, void is also a good option if you only want a helm and weapon switch. Use offensive range and mage prayers. Getting There: ::home > Nexus > Bosses > Zulrah Pot up, pray range and your offensive prayer and board the boat. The Fight: The differences from OSRS: Zulrah differs a bit from OSRS zulrah, dont worry though because this zulrah is a lot easier in my opinon but takes a bit of getting used to. First off venom clouds never inflict venom. They do damage you if you stand in them but they do not cause you to get venomed so do not worry about bringing a anti venom. Second the rotations are the same as (i think) OSRS but they are not hard to learn, I would list them all but you can find them on the osrs wiki. Lastly the most annoying difference is that the melee phase lags after an attack so you have to keep running until it makes another action or you will get hit. The "3" Phases: Range phase(also jad phase): This green phase of zulrah is the starting phase of every fight and you should pray range for it. If hybriding you should attack this phase with magic. Sometimes later in the fight it will have a jad phase meaning it will attack with range and mage. You can try to pray flick it similar to a jad fight however I usually tank the hits and tick eat. Mage Phase: This blue phase of zulrah is the mage phase. It will attack always with a combination of mage and range attacks however you should pray mage, you can prayer flick between mage and range if you want. If you don't prayer flick just make sure to tick eat big hits. This phase is attacked with range if you are hybriding. Melee Phase: This red phase of zulrah is a melee phase. To be honest, he is kind of a cunt. He will do an animation of charging an attack with his tail and when it strikes you have to move to avoid damage. However sometimes his attack lags and you have to keep running to avoid the hit. You can pray melee to avoid this however. This phase should be attacked with magic if hybriding. Snakelings: Zulrah spawns these little shits throughout the fight. Don't worry or attack them as your ring of recoil will kill them quickly. Where to Stand to Avoid Venom: Each phase zulrah will move to another area around the island and spawn more venom clouds. To avoid these clouds, I and many players have found it best to stand at these two circled spots most of the time. Here you should be safe from the venom although some times during the fight you will have to run into the venom to avoid a melee attack or be able to reach zulrah. However sometimes the front the island will have no venom and you can stand here as well. Drops: - Zulrah's Scales: Always - Tanzanite Fang: 1/512 - Magic Fang: 1/512 - Serpentine Visage: 1/512 - Uncut Onyx: 1/512 - Tanzanite Mutagen: 1/6553 - Magma Mutagen: 1/6553 - Pet Snakeling: 1/4000 - Jar of Swamp: 1/3000 Full list of drops found here: https://oldschool.runescape.wiki/w/Zulrah Hope you enjoyed my guide!
-
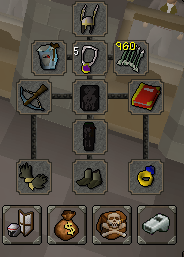
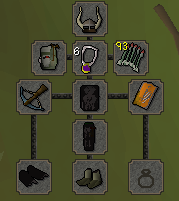
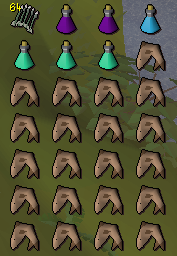
Con's Commander Zilyana Guide GODWARS IS NOT A SAFE DEATH FOR HARDCORE Intro: Commander Zilyana or as I'll refer to them as Sara during this gude, is one of the 4 godwars bosses. She drops the best in slot crossbow the Armadyl Crossbow along with the Saradomin hilt and the pet. Recommend Levels: 80+ Range 80+ Defense 70+ Hitpoints 44+ Prayer Gear and Inventory: This setup is geared towards slayer task, but if you are not on task sub out the slayer helm for a archers helm or a armadyl helmet. ACB can be subbed out with a RCB and the blowpipe is used to kill the minions quickly so it is not needed. The runes in the rune pouch are earth,water and nature and are used for bones to peaches to extend trips. Bring any sara item to have no agro with the saradomin creatures. Getting there: ::home > nexus > Dungeons > God Wars Dungeon Once there go east to sara's corner. Once here climb down the rock. Here you get the kc to be able to enter Sara's lair. KC amount: 40 - No donor rank 35 - Emerald rank 30 - Ruby rank 25 - Diamond rank 20 - Dragonstone rank 15 - Onyx Rank I recommend killing spirtual mages for the chance at dboots. Once you have the kc, go south and climb down the next rock. The fight: The fight is going to be broken down into two sections. This is because on BoomScape atm, minions can not attack after they die once. First Kill: Enter the lair with protect from mage and eagle's eye/rigour. The strategy for killing saradomin is running in a circle to not allow her to attack you. This is done by: Running to a corner then attack Sara. Quickly run to next corner and attack. Repeat until kill is done. After this kill starlight first because it is the melee minion. Then kill Starlight(magic). After this pray range and kill bree(range). After the first kill: Now after the minions are killed they won't be able to attack you. Repeat the same strategy of running to each corner and attacking however this time you only need to pray eagle's eye/riguor. When you need more prayer points recharge at the altar in the lair. After sara is dead you can kill the minons freely without them attacking you. If you need food make sure to pick up the bones and bones to peaches them. Drops: Saradomin Hilt - (1/508) Armadyl Crossbow - (1/508) Saradomin Sword - (1/127) Pet Ziylana - (1/5000) Hope you enjoyed my guide!
-
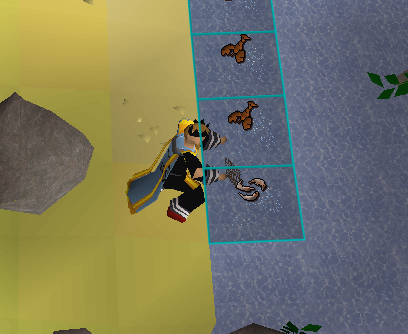
Con's Fishing Guide Intro: Fishing is a useful skill in BoomScape if you want to AFK a lot or for some reason want to catch your own dinner. However the skillcape looks really good and is overall an easy grind. In this guide I'll walk you through the most efficent ways to get 99 fishing although there are many different ways and I may note them throughout this guide. This guide will not include the cooking of the fish although it is a good idea to bank them for your cooking grind in the future. Requirements: To get started go to ::home and at shops talk to the fisherman. From him buy a small net and a harpoon, should not cost more than a couple hundred gp at most. 1-99: 1-35: Go ::home > nexus > cities > Camelot From here run south-east along the path to the fishing spots east of Catherby. Here we can start fishing shrimps. The spots can be found using the runelite client if you are on PC, otherwise look for the small net spots. From level 1-15 you will only be catching shrimp. Shrimp give 400 xp each and you will need to catch 7 shrimp for level 15. At level 15 you start catching anchovies as well. Anchovies give 1600 xp each and will need to catch about 25 shrimp and 7 anchovies for level 35 but this is dependent on RNG. 35-70: Now you will be using your harpoon and catching Tuna/Swordfish although you won't catch swordfish until level 50. The harpoon spots can be found with the lobster symbol on runelite or by the harpoon if you are on mobile. From level 35-50 you will only be catching tuna. Tuna give 3,200 xp each and you will need to catch 25 tuna for level 50. At level 50 you will start catching swordfish as well. Swordfish give 4,000 xp each and will need to catch about 100 tuna and 80 swordfish for level 70 but this is dependent on RNG. 70-99: Although there is many methods to 99 in fishing, the method I found fastest is to fish for monkfish as you catch them really quick and get a high xp rate for them. Go ::home > skilling > piscatoris fishing Once here, make sure you have your small net and head to the fishing spots. The monkfish spots are shown on runelite or by clicking on the net spots if you are on mobile. Each monkfish gives 4,800xp and you will need to catch 2,562 monkfish for level 99. Although this seems like a lot it goes by real quick and is very afk. Feel free to try fishing sharks at the fishing guild at around level 80. Hope you enjoyed my guide!
-
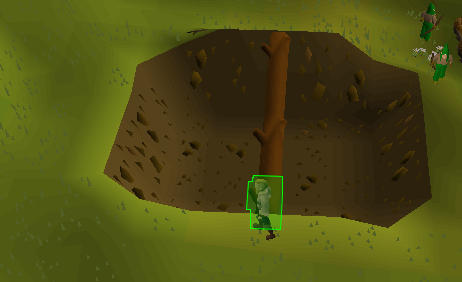
Con's KBD Guide KBD IS NOT A SAFE DEATH FOR HARDCORE TO GET TO KBD YOU MUST GO THROUGH WILDY Intro: King Black Dragon also known as KBD is the king of all dragons, although do not let that scare you as he is not that powerful and can be defeated with ease by most. He has a few sought after drops such as the draconic visage(used to make dragonfire shield, kbd heads, dragon pickaxe, and his pet. KBD resides in the deep wildy and it must be traversed to reach him, although in his in lair you can not be killed by other players. Recommend Levels: If using melee: 80+ Attack 80+ Strength 70+ HP 70+ Prayer If using ranged: 80+ ranged 70+ hp 74+ prayer Gear and Inventory: Ranged(Low budget): In this setup, drink a antifire and when KBD is near half health switch to diamond bolts(e). Prayer Eagle's Eye or Riguor if you have it Ranged(Higher Budget): In this setup, drink a super antifire and pray mage and Eagle's Eye/Riguor Melee: To be honest do not bother with melee unless you have a dragon hunter lance, range will be better. If you have the lance, I trust you on your gear set up ? Getting there: *You can be pked on your way to KBD do not bring gear you do not want to lose* ::home > nexus > wilderness > lava maze From here run northwest and enter the fenced area. Run to the ladder and go down it. Once down there pull the lever and you will enter KBD's lair and are now safe from pkers. The Fight: The fight is pretty straight forward. Pot up your combat pot, either range or melee then drink a antifire potion. If you are using a anti dragon-fire shield or dragonfire shield there is no need to pray mage but if you are using a blowpipe or another two-handed weapon then pray mage. Then basically sit back and enjoy killing KBD. A note, KBD's white firebreath will freeze you but that is the only firebreath you got to worry about espeically if you are meleeing otherwise you should be good to go. Just rememeber to eat and repot your antifire when it runs out. Drops: KBD Pet - 1/3000 Goodluck on the pet drop everyone! Hope you enjoyed my guide!
-
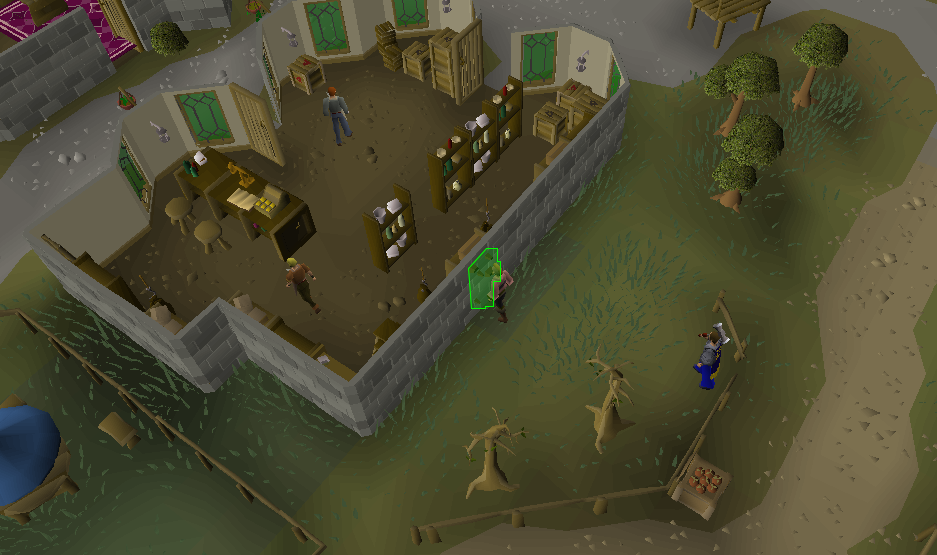
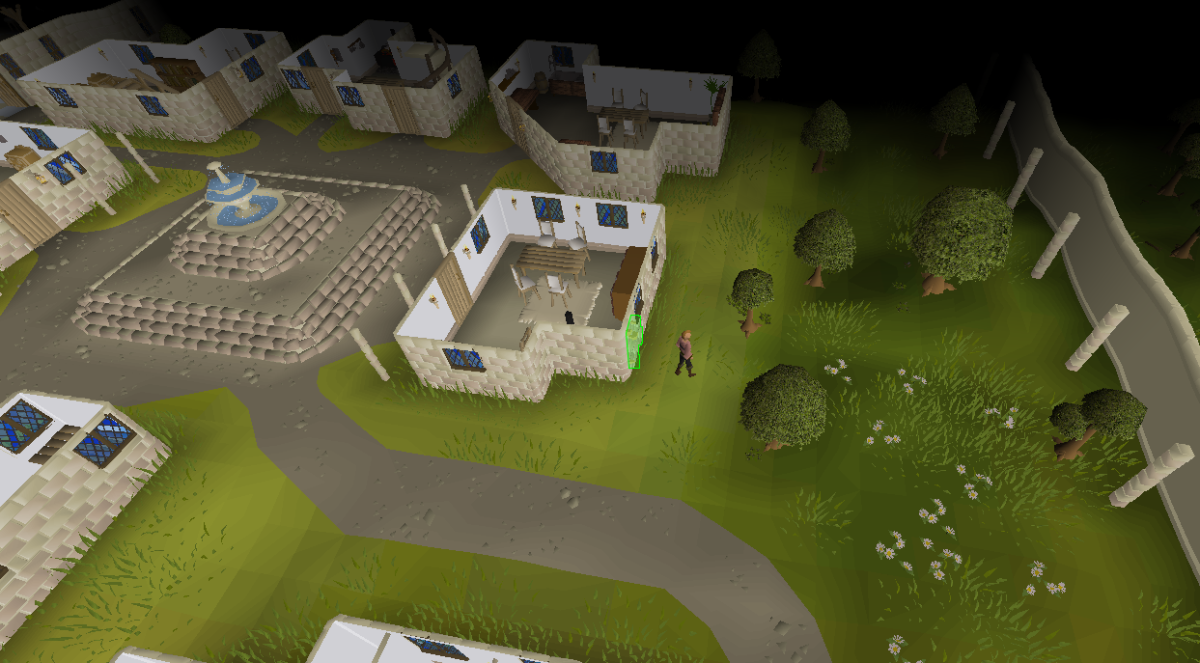
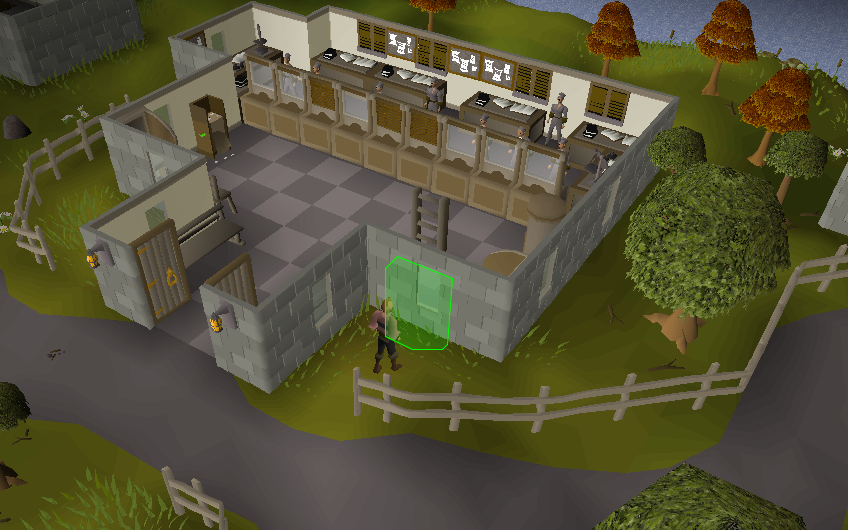
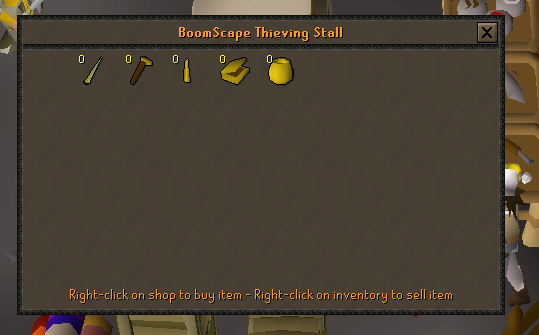
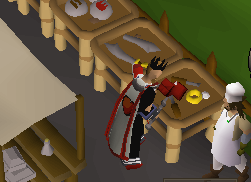
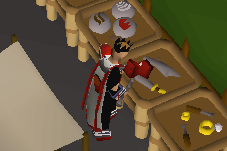
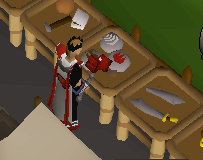
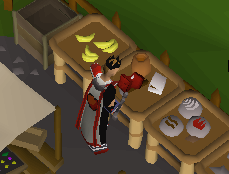
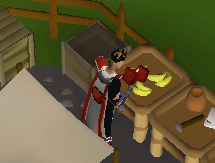
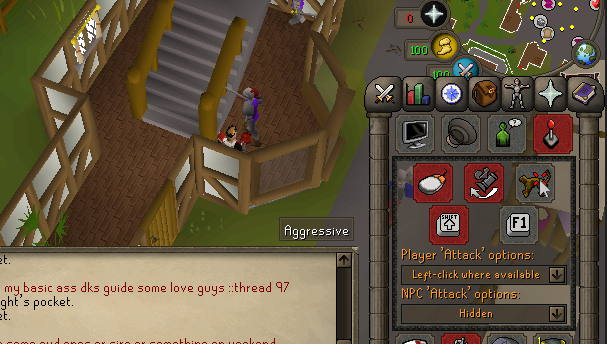
Con's Thieving Guide *All xp rates in this guide are without the rouge outfit* Intro: Thieving is a skill on BoomScape made to make money. It is great starter cash or if you need a little money to buy a new item. In this guide I'll talk about the money route to 99 and the fastest route to 99. Feel free to do either one, or a mix of both. During thieving you have chance of being visted by a pillory guard, dont worry just talk to him and you will recieve a xp lamp(I recommend farming because its slow till level 45). During pickpocketing only you have a chance to recieve a crate, in the crate you can choose a piece of rouge's equipment. Each piece gives a 1.25% xp bonus in thieving. Requirements: Time The will to click a lot Selling Stall Items: Trade the baker at ::home to sell the items from the stalls Golden Needle: 2k each Golden Hammer: 3k each Golden Candle: 4k each Golden Tinderbox: 5k each Golden Pot: 7k each 1-99: The guide will diverge at certain levels for faster xp or more money but both start the same. 1-5: Pickpocket from men at ::home 384 xp per pickpocket 2 pickpockets required for level 5 5-25: Steal from crafting stalls at ::home 1,200 xp per Golden Needles 2k gp per Golden Needles 7 needles to steal for level 25 14k profit 25-45: Steal from scimitar stalls at ::home 1800 xp per Golden Hammer 3k gp per Golden Hammer 30 hammers to steal for level 45 90k profit 45-75: Steal from magic stalls at ::home 2400 xp per Golden Candle 4k gp per Golden Candle 479 candles to steal for level 75 1.9m Profit 75-99 (Money): 75-90: Steal from general stalls at ::home 4,000 xp per Golden Tinderbox 5k gp per Golden Tinderbox 1,034 tinderboxes to steal for level 90 5.2m profit 90-99: Steal from food stalls at ::home 6400 xp per Golden Pot 7k gp per Golden Pot 1202 pots to steal for level 99 8.4m profit 75-99 (Quick XP): 90-95: Pickpocket Ardy knights To get there: ::home > nexus > cities > Ardounge I recommend to turn off npc attack option in setting as it allows you to left click pickpocket. I also recommend to trap a knight in a house if there isnt one trapped already. 4,046 xp per pickpocket 1,869 pickpockets to level 95 95-99: Pickpocket Ardy heros To get there: ::home > nexus > cities > Ardounge *You still have a chance to fail at 99 so if you dont want to fail stick to ardy knights* 13,200 xp per pickpocket 323 pickpockets to level 99 Hope you enjoyed my guide!
-
Great and simple guide!
-
Thank you Ash!
- 5 replies
-
- 1
-

-
- bounty hunter
- ash lauren
- (and 3 more)
-
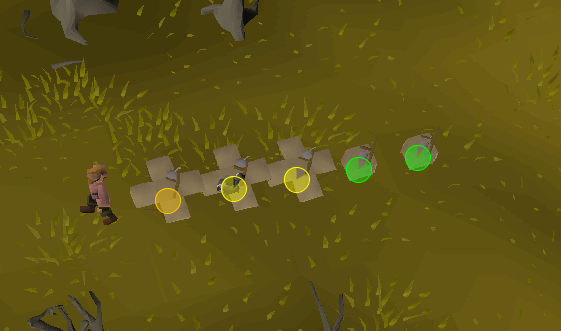
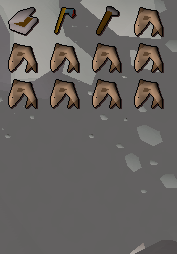
Con and Mosey's Motherlode Mine Guide Intro: Motherlode is a mining minigame on Boomscape. It can be used a way to afk mine as well to unlock the prospector outfit that gives a great mining xp boost when the full set is worn. Required: 30 Mining (At least 41 for rune pick is recommend) This can be gotten by mining bronze and iron west of ::home. Should take no longer than 5 minutes. A pickaxe Can be bought at shops at home. We recommend at least a rune pickaxe but can be done with lower. A hammer Can be bought from the general store person at shops at home. Getting There: There are two ways of getting to motherlode mine on Boomscape: 1. Run west of home to the mine and then enter the cave in mining pit. 2. ::home > minigames > motherlode mine and then enter the cave. How it Works: Once there you can start mining the paydirt viens scattered around the mine. Turning on the runelite "Motherlode mine" plugin can help you quickly find them as they deplete after you get 1 - 5 paydirt. Once you have a full inventory of paydirt head to the center of the mine. Fix the 2 water wheels with your hammer to get the wash running. Only 1 has to be running but why not fix both, free smithing xp. Once the wash is running, deposit your paydirt in the hopper to the north and it will be washed down to the sack to the south. After this, collect your ores and gold nuggets, bank, and repeat! Here are the rates you will receive ore from the paydirt. THE GOLD NUGGET DROPRATE IS HIGHER ON BOOMSCAPE EXPECT AROUND 4 PER INVENTORY. XP and Rewards: 30-99(Full prospector): 8.4k per paydirt 1551 paydirt to 99 30-99(No prospector): 2.4k per paydirt 5426 paydirt to 99 As you can see it is very important to buy prospectors either through getting gold nuggets at motherlode mine or through a donation to the server through bonds or with the store. Rewards: If you talk to prospector percy you can view his store, all the items in here can be bought with gold nuggets. Hope you enjoyed our Motherlode Mine Guide and happy grinding!
-
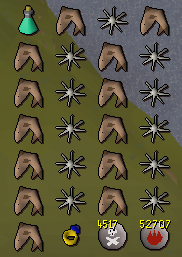
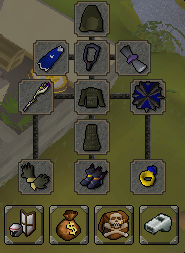
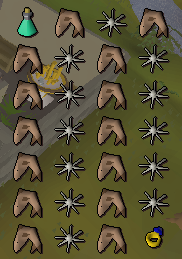
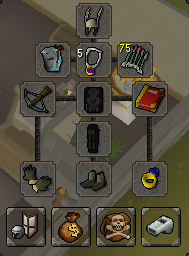
Con's Bandos Guide GODWARS IS NOT A SAFE DEATH FOR HARDCORE Intro: General Graardor (Bandos) is one of the 4 godwars bosses. He drops the best in slot melee armor, the bandos tassets and bandos chestplate. He also drops bandos boots and of course the bandos pet. Recommend Levels: 80+ Hp 80+ Attack 80+ Strength 90+ Defence 80+ Range 70+ Magic 70+ Prayer Gear and Inventory: This is the gear I have been successful with soloing bandos. It is not the best gear and also is not the worst gear. Feel free to modify the gear and inventory as you wish. Barrows armor is almost necessary when soloing bandos because of how many hits you have to tank. The rune kite is probably the worst in-slot that is passible. A better upgrade would be a crystal shield or any spirit shield. The dwh or bgs can be used to spec bandos each kill to lower his defence and make the kills quicker. In the rune pouch are water,earth and nature runes to be able to cast bones to peaches. This will extremely extend your trips. Getting There: ::home > Nexus > Dungeons > God Wars Dungeon Once there go to the northwest to bandos' corner. Once in his corner you have to get a certain kc to be able to enter Bandos' liar. KC amount: 40 - No donor rank 35 - Emerald rank 30 - Ruby rank 25 - Diamond rank 20 - Dragonstone rank 15 - Onyx Rank A good spot to get kc is the door before bandos' corner. Here you can hide from getting stacked as god items do no protect you(this will probably be fixed) God items do now protect you. You can also get quick kc here because of the goblins. The Fight: Fighting bandos on Boomscape is interesting. When you first enter bandos' liar. Pray melee and piety. The 3 minions and bandos will attack you. This will be you're hardest kill because after you kill bandos and all the minions the minions won't be able to attack you again even if you attack them. (This will probably get fixed as well) So when you enter, pray melee and piety, spec bandos with your defense draining spec if you have it. Bandos has one attack to worry about. He smashes the ground and white waves will hit you. If they hit, they will hit quite a bit so have high health here. Once bandos is dead on your first kill, pray magic and kill the magic minion. Then kill the other two. Pick up their bones and cast bones to peaches and repeat. However this time the minions can not attack you at all so you do not need to pray after bandos is dead. After each kill, be sure to pray here. On Boomscape you can pray here as many times you want per trip. As you can see, the minions are not attacking at all. On the right is the mage minion. The right of bandos is the melee minion and on the bottom of the picture is the melee minion. Although this does not matter after the first kill of the trip. Be sure to pick up bones and food the minions drop to extend trips. Drops: Bandos tassets - (1/381) Bandos chestplate - (1/381) Bandos boots - (1/381) Bandos hilt - (1/508) Godsword shard 1,2,3 - (1/762) Pet general graador - (1/5000) Hope you enjoyed my guide!
-
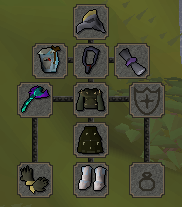
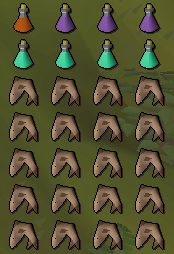
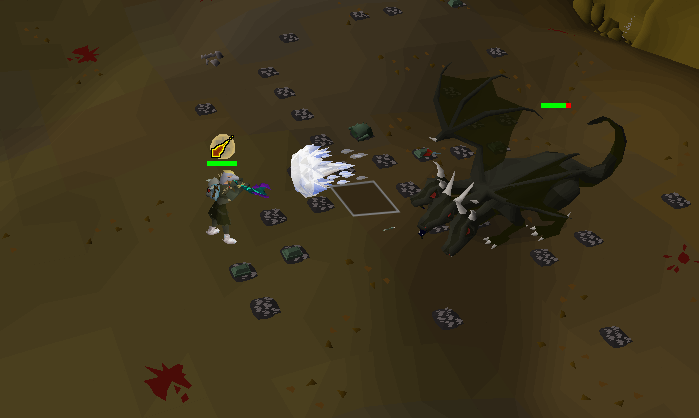
Con's Vorkath Guide VORKATH IS NOT A SAFE DEATH FOR HARDCORE Intro: Vorkath is a undead dragon boss who is a powerful and has attack that can 1 hit you if you are not prepared. Don't worry because after this guide you will be able to defeat him with ease ?. He is an important boss to kill because he drops a vorkath head which can be combined with an ava's accummulator to make an ava's assembler which is best in slot for range. (Also the pet is sick). Recommend Levels: 85+ Range 80+ Attack 85+ Strength 75+ Defense 70+ Prayer Gear and Inventory: Setup 1, Elite void and dragon warhammer: In this setup we use a imbued salve amulet because Vorkath is an undead monster. We use ruby bolts(e) + diamond bolts(e). The dragon warhammer + melee helm is used in the beginning of the fight to lower Vorkath's defence (can be replaced with bandos godsword). In the rune pouch we have runes for crumble undead (chaos,air and earth). Setup 2, Budget: Similar to setup one we use ruby bolts(e) + diamond bolts(e). We also bring the same runes in the rune pouch for crumble undead. You do not need a rune pouch(can be bought from vote shop) but it helps save inventory. So about these gear setups. We bring ruby bolts(e) for the first half of the fight for it's proc once Vorkath is health is at 265hp we switch to diamond bolts(e) because rubies proc becomes inefficent. We bring a dwh or bgs for its spec because it lowers Vorkath's defense making the fight quicker. Obviously neither of these gear setups are perfect so feel free to change as you will. If you want to use a blowpipe make sure to have a super antifire with you. If you only have a antifire you need an anti-dragon fire shield or better. Getting there: ::home > nexus > bosses > vorkath Once there jump over the ice chunks to the north. This area is instanced now and no one else can join. To start the fight poke Vorkath. The fight: Before poking vorkath pot up with antifire and range pot and then do either of the three things depending on your gear. If using a spec weapon, pray range and piety. Get you spec weapon ready and then poke vorkath and dump specs. Then switch to eagle's eye/riguor and switch to your range weapon. If not using a spec weapon. Pray range and eagle's eye/riguor. If using blowpipe, pray mage and eagle's eye/riguor. Now during the fight 5 normal attacks (besides melee but dont worry about that) and 3 special attacks. Normal: Magic attack that deals magic damage. Ranged attack that deals range damage. Normal dragonfire attack that deals dragonfire damage. Venom dragonfire attack (DOES NOT DEAL VENOM ATM) but deals dragonfire damage. Purple dragonfire that turns off your prayers. Special: Deadly dragonfire attack(not that deadly) when you see vorkath shoot into the air, run! This will hit the tile you currently are standing on at the time it is shot. It can deal a load of damage if it hits you. Acid pool attack which covers the area with pools of acid(THEY DO NOT POSION YOU ATM IF YOU STEP ON ONE). While this happens Vorkath shoots small fireballs at you real quickly. To avoid this, run around the pools of acid until he stops and the acid disappears. If you are a pvm god, then woox walk it, but if you can woox walk why are you reading this ? Zombified ice dragonfire attack. Vorkath freezes you and spawns a zombified spawn. This bugger can be one hit using crumble undead. If it is not killed by the time it gets to you then it will exploded and deal a load of damage (around 38). Now knowing these attacks, the fight should go smoothly just be sure not to get hit by the specials and you should live. ? Drops: Everytime kill: 2 Superior dragon bones 2 blue dhide Weapons and armor: Rune longsword 2-3 (2 x 1/30) Rune kiteshield 2-3 (2 x 1/30) Battlestaff 5-15 (2 x 1/37.5) Dragon battleaxe (2 x 1/75) Dragon longsword (2 x 1/75) Dragon platelegs (2 x 1/75) Dragon plateskirt (2 x 1/75) The rares: Vorkath's head (1/50 but you will always get it on every 50th kill) Dragonbone necklace (1/1000) Jar of deacy (1/1000) Vorki (1/3000) Draconic visage (1/5000) Skeletal visage (1/5000) The other drops include dragon hides, seeds, fletching items, runes, and some other stuff you can find it all here: https://oldschool.runescape.wiki/w/Vorkath Hope you enjoyed my guide!
-
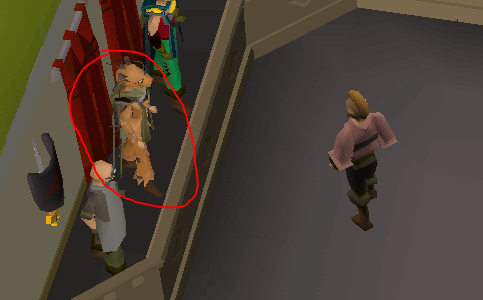
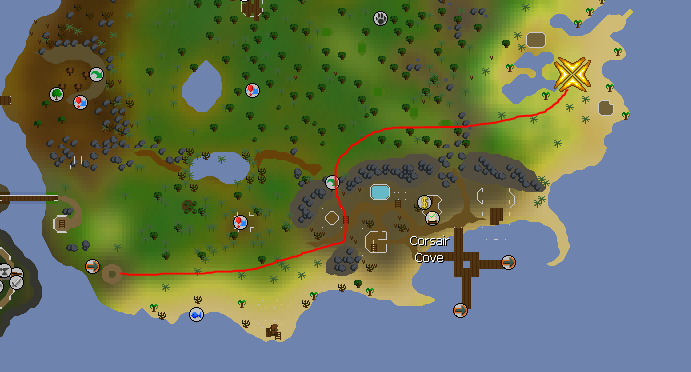
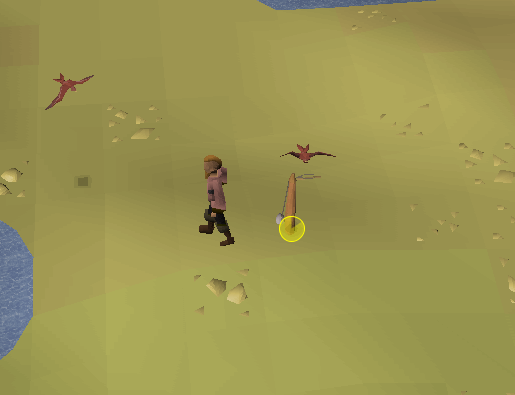
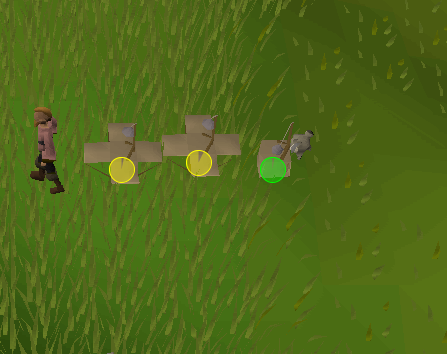
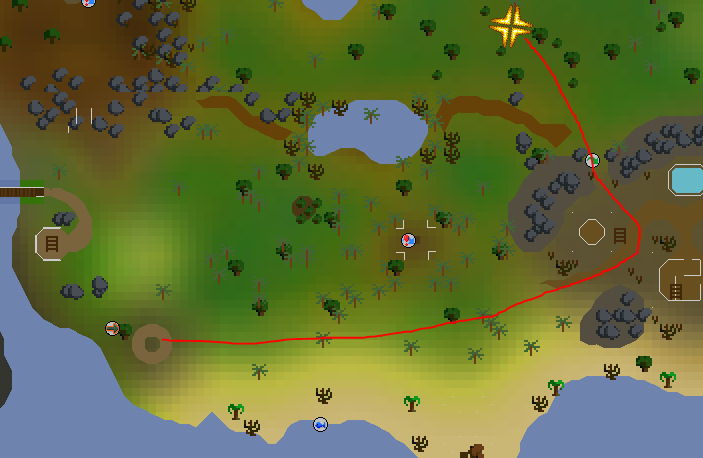
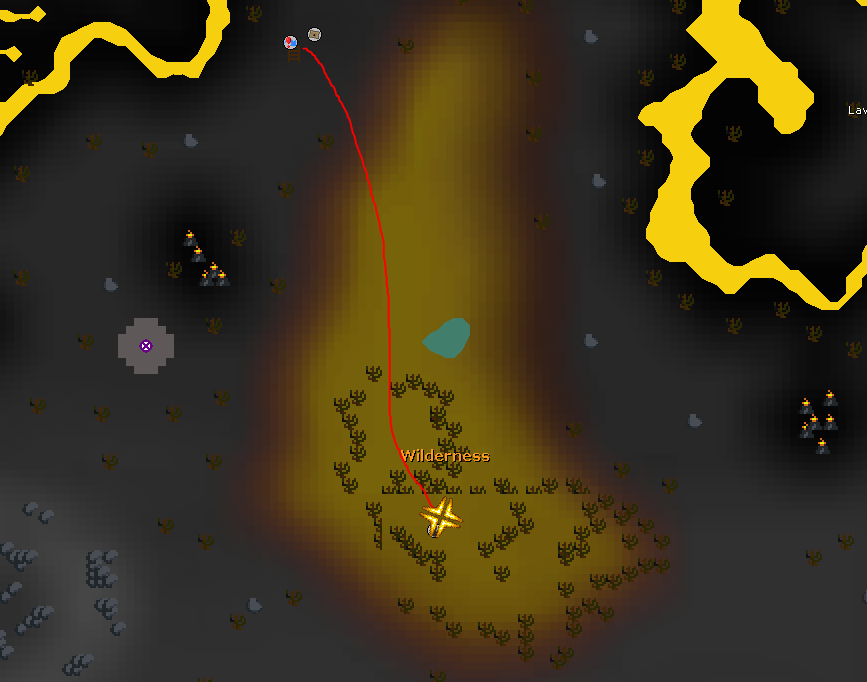
Con's Hunter Guide Intro: Hunter is a skill used to catch various creatures around Boomscape. It can be used as a good money make to catch high level implings or just an annoying skill on your max grind. Requirements: Bought at the hunter shop at ::home: A few bird snares 5 box traps 10 agility To be able to get to crimson swifts and red chinchompas. Can be trained at tree gnome stronghold course (::home > nexus > cities > tree gnome stronghold) 1-53 Hunter: Grab 3 bird snares and go to the nexus. Go to skilling and teleport to feldip hills. Once there follow this map to get to the crimson swifts (NEED 10 AGILITY TO PASS THE SHORTCUT). Once there set up a bird snare and start grinding. At level 20 you can set 2 snares and at level 40 you can set 3 snares. Each crimson swift gives 1360 xp. From 1-53 you will have to catch 101 crimson swifts. 53-63 Hunter: Grab 4 box traps and head to the nexus. Go to skilling then teleport to woodland hunter. When you teleport you can setup 3 box traps right where you are and start catching chinchompas. At level 60 you can set up 4 box traps Each chinchompa gives 7,936 xp. From 53-63 you will have to catch 30 chinchompas. 63-73 Hunter (63-99 if a hardcore ironman): Grab 4 box traps and head to the nexus. Go to skilling and the teleport to feldip hills. Follow the map to get to red chinchompas. Lay down 4 box traps and start catching them. Each red chinchompa gives 10,600 xp. From 63-73 you will have to catch 59 red chinchompas. 73-99 Hunter: THIS IS IN THE WILDY. DO NOT BRING ANY ITEMS YOU ARE WILLING TO LOSE. Grab 5 box traps and an amulet of glory (for a quick teleport out of wildy). Head to the nexus, go to wilderness and then teleport to revenants. Exit the cave and follow the map to black chinchompas. Lay 4 box traps and start catching them. At level 80 you can lay 5 box traps. Each black chinchompa gives 10,600 xp. From 73-99 you will have to catch 764 black chinchompas. Hope you enjoyed my guide!
-
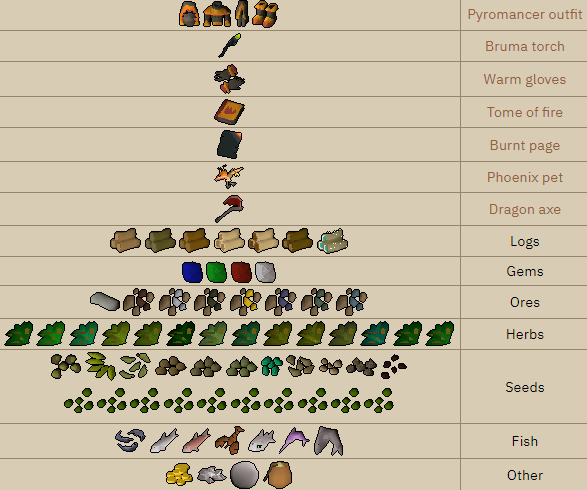
Con's Solo Wintertodt Guide Disclaimer: Wintertodt solo's have many ways to do it. This guide will talk about my main method and a few others. Feel free to modify it for your needs or wants of how you want to do it. WINTERTODT IS NOT A SAFE DEATH FOR HARDCORE! Intro: Wintertodt is the firemaking boss. It offers the best firemaking xp/hr in Boomscape and can be done solo, duo,trio,etc. It consists of lighting braizers, feeding the braizers, fixing braizers, and woodcutting. Requirements: 50 firemaking A hammer Can be bought at shops or can get one for free at Wintertodt A axe A bronze axe can be gotten at Wintertodt or a better one can be bought at the shops. Tinderbox Can be ought at shops or can get one for free at Wintertodt Food Warm clothing is not required on Boomscape Recommended: 60+ woodcutting Rune axe or Dragon axe 8-10 high healing food per run Owning a house If you do not own a house you will not receive construction xp. To Get Started: To get there: Go ::home, then go to the nexus, then minigames, then click on Wintertodt. Once at Wintertodt, talk to Ignisia. After talking to him/her (assume it's a girl idk) go to the door's of dinh to enter Wintertodt. Have a similar inventory to this before starting. Mechanics: Inside wintertodt there is 4 braizers. In a solo run you usually only worry about keeping one or two lit. Well those braizers are lit you cut bruma logs that can be added to the braizer for points(Need 500 to recieve a crate). However during this, wintertodt has a random chance of hitting you with cold. This will damage you for a small amount and stop the action you are doing. Another mechanic you have to watch out for are snowfalls. You will see snowflakes start to fall where you are. When you see this run, because soon piles of snow will fall and damage you quite significantly. This snow can also fall on a braizer and it will break it. To fix it click on it(must have a hammer) and it will be repaired. Now you have to relight it. Soloing Wintertodt (My Strategy): Windertodt has a energy bar that is basically its health. It slowly goes down as long as one braizer is lit. When soloing I keep two braizers lit. During the time they are lit I cut down bruma logs to add to the braizers. When my inventory is full of bruma logs or a braizer goes down I add them to the braizer. I then rinse and repeat this until wintertodt's energy is zero. Soloing Wintertodt (Other Way to Do it): There is many other ways to do it so I'll go over two: 1. Cut logs until inventory is full, light one braizer and add logs until you are out. Let braizer go out and repeat. This method makes the games last a lot longer but you will get more points and get more xp/hr. However you will need to bring more food. 2. Similar to my method, but you just light one braizer and keep relighting it while cutting logs. This method is slightly faster than the previous but you get less points/xp per game but require less food. XP gained: The xp gained is going to vary ALOT. This is because as your firemaking/woodcutting/construction is leveled up, you gain more experience from each action. Below is the experience and amount of games from 50-99 firemaking. 8 games played for 50-99 firemaking 1-70 construction 32 supply crates 500k woodcutting xp Rewards: For every 500 points you earn in the wintertodt you give a supply crate. From these you can get pieces to the pyromancer outfit, the phoenix pet, dragon axe, burnt pages, and the tome of fire. Below are all the possible other rewards. (I would of typed this all out but its a lot) Hope you enjoyed my guide!
-
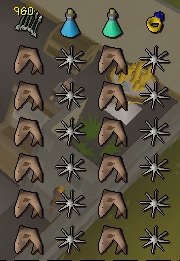
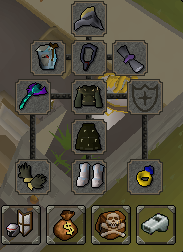
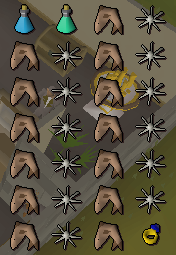
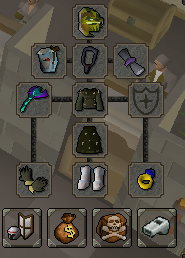
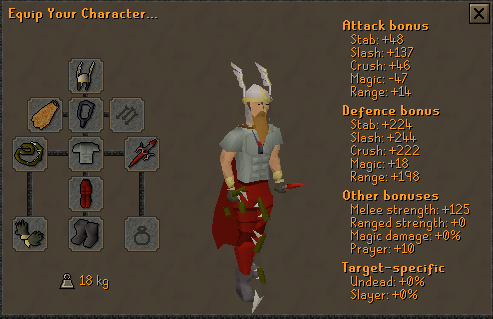
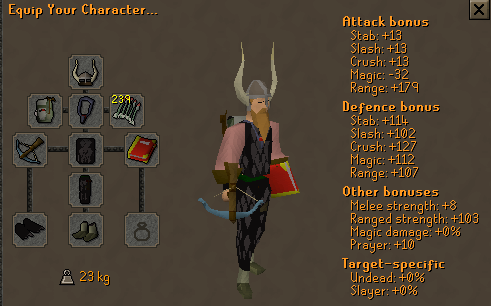
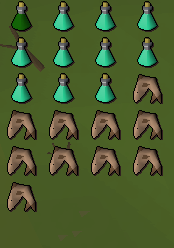
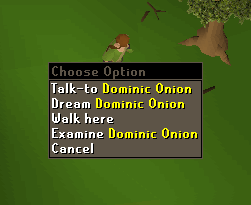
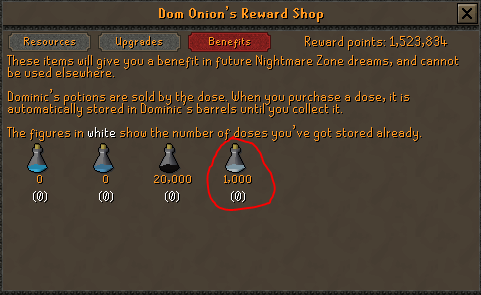
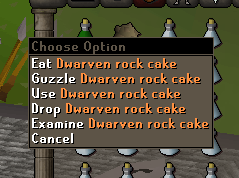
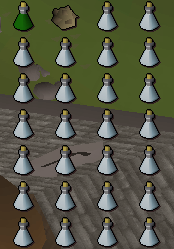
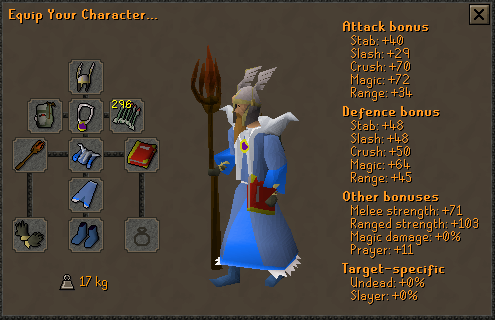
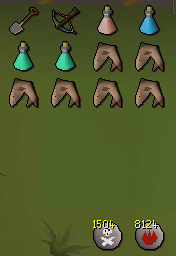
Con's NMZ Guide Intro: NMZ is a minigame mainly used to afk train combat skills. It can also be used to purchase items and imbue gear to make it more powerful using points from the minigame. Requirements: Stats: I recommend base 60 combat stats to make NMZ even efficent training. The higher the better though. It can be done with 1 defence and prayer as well. Gear: Melee Setup Example: When doing NMZ you want to go for straight offensive and strength bonus. This because we will be protected from any damage. The gear can be better or worst than this. Just what I had at the time. ? Range Setup Example: Again here, go for all offensive range bonus. To Get Started: To get there go ::home, to the nexus, then minigames, then to nightmare zone. First game: This is a seperate section because your first game is going to be completly different from all the others. This is because we do not have absorption potions unlocked yet(Bought using nmz points). So for this first dream we will be using a inventory similar to this: Now you want to right-click Dominic and click dream. You want to choose hard now because it will grant you more points. Once in the dream pray melee the whole time and fight the quest bosses that spawn. Once you are out of food and prayer pots click the potion to the south to leave. NMZ Strategy After First Game: Now that you have some points it is time use the real NMZ strategy. Getting setup: The chest near NMZ is the rewards shop. In the benefits tab there are absorption potions. These potions negate all damage but use up a charge of the potions per 1 damage. When you drink a dose of the potion you gain 50 absorption points. You can 1000 points at a time. To make the points last longer we are going to use a Dwarven Rock Cake. This can be bought at ::home in the shops. The rock cake has two options eat and guzzle. When you are above 12 hp you want to guzzle, and to get down to 1 hp you want to eat. Don't worry it cant kill you. So now you want to get a similar inventory to mine and enter the NMZ again. When you buy absorption potions, buying 1 dose actually buys a 4 dose potions. Once in the NMZ you drink your absorption potions to 1000 points and then rock cake to one hp. You can now afk until you need to drink absorption pots again or rock cake down to 1 again. Rewards: Besides absorption potions you can buy imbues for various gear making them stronger or have a more wide use. Below are the imbuable items and their price: Black Mask - 1.25m points Slayer Helmet - 1.25m points Salve amulet - 800k points Ring of the gods - 650k points RIng of suffering - 725k points Berserker ring - 650k points Warrior ring - 650k points Archers ring - 650k points Seers ring - 650k points Tyrannical ring - 650k points Treasonous ring - 650k points Granite ring - 500k points If you want to know what the item does when imbued look up "item name + (i)" on google. If I listed them all this guide would become a dictionary ? Hope this guide helped some of you out!
-
Glad you're enjoying your time here! Always a great thing to have helpful people in the community ?
-
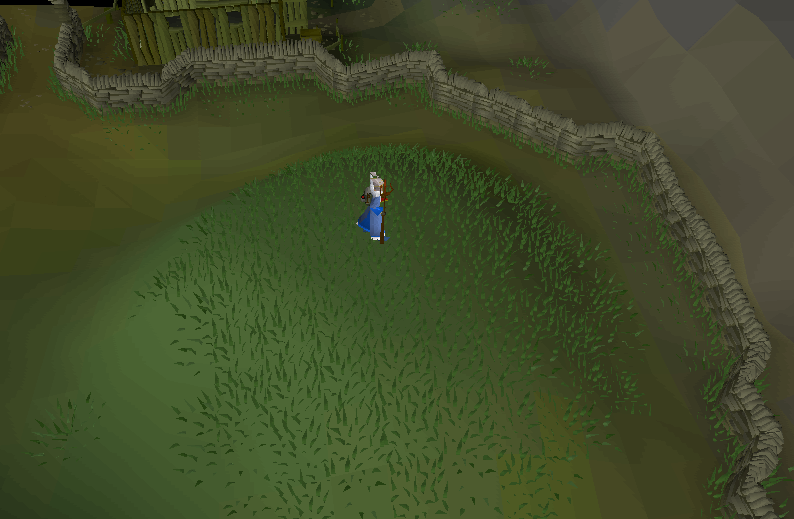
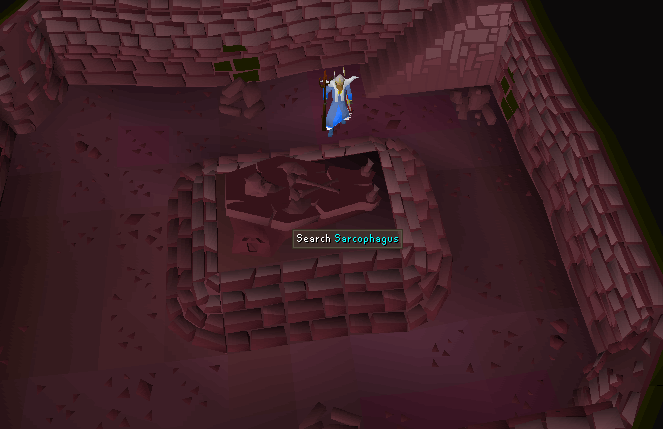
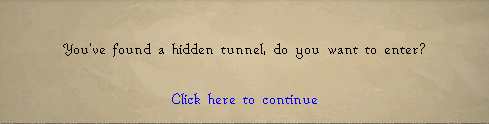
Con's Barrows Made Easy Guide This guide will walk through the basics of barrows with the minimum gear requirements and levels. Obviously better/worse gear and levels can be used but this guide will use a average setup This guide is not meant to be a optimal gear setup for speed, it is more of an introdution to newer players to the mechanics and gear needed for barrows. Intro: Barrows a minigame/demi-bosses that reward barrows equipment, mid tier armor and weapons. There are 6 brothers: Ahrim, Dharok, Guthan, Karil, Torag, and Verac. Each have their own unique armor and weapon that has a special effect when a full set is worn. Requirements: Levels (Recommend for cheap gear setup): -60 magic (the higher the better) -50 attack -43 prayer (required) -61 range Gear Setup: In this setup, we opt for a high magic bonus to increase kill speeds. This can be replaced with melee armor because the brothers have a negative magic defense so you're magic attack bonus does not need to be positive. Inventory: Prayer potions are not required because you can use ::home and use the orante pool to regain prayer points if you can not afford prayer pots. How to get there: Go ::home, then use nexus, go to minigames, then click on barrows. Barrows in a nutshell: This is the location of each brother and what to pray when fighting them. PAY ATTENTION TO THIS AND REMEMBER WHAT TO PRAY. What to do: Walk on to one of the mounds and click on your spade. This will bring you into a catacomb of the brother. Once inside, turn on your prayer and make sure to have the right weapon equipped. (This will be discussed in the "Fighting the brothers" section) In one of the brothers catacombs you will find this message when clicking on a sarcophagus. This will bring you to the reward chest room. You do not want to do this until you have killed the other 5 brothers so leave and then come back to this one once they are killed. Once in the reward room, you will have to kill the last brother once you try to open the chest. After the fight you may search the chest and get your reward. Fighting the Brothers: Dharok: -Pray melee -Use Iban's blast Ahrim: -Pray magic -Use rune crossbow Verac: -Pray melee -Use Iban's blast -He can hit through prayer, so watch your health Guthan: -Pray melee -Use Iban's blast Torag: -Pray melee -Use Iban's blast Karil: -Pray range -Use Iban's blast Rewards: Torag's equipment Verac's equipment Karil's equipment Guthan's equipment Dharok's equipment Ahrim's equipment Bolt Racks (Used in karil's crossbow) Runes(Mind,Chaos,Death,Blood) Coins Crystal Key(Tooth and loop) Clues Barrows Equipment Set Specials: Dharok's: -The lower your hp is, the higher max hit becomes. Ahrim's: -Magic Attacks have a 25% chance of lower a enemy's strength by 5 levels repeatedly Verac's: -Attacks have a 25% chance of a guaranteed hit Guthan: -Attacks have a 25% chance of healing you equal to the damage delt Torag: -Attacks have a 25% chance of lowering the enemys run energy by 20% Karil: -Attacks have a 25% chance of lowering the targets agility by 20% Hope this guide helped you out at barrows if you are new or just needed a refresher ?¢¤¯¸
-
I love to bake, fresh crossiants and bread are so good


 Johnny Test